

In the ever-evolving landscape of digital design, Adobe Photoshop continues to lead the way with groundbreaking features. One such feature that has taken the design world by storm is Photoshop’s AI Generative Fill. This powerful tool harnesses the capabilities of machine learning AI to revolutionize the way we edit, enhance, and create images. In this article, we will delve into the intricacies of Photoshop AI Generative Fill, exploring its functionalities, benefits, use cases, and a step-by-step guide on how to make the most of this cutting-edge tool.
Understanding Photoshop AI Generative Fill
At its core, Photoshop AI Generative Fill is a game-changer in image editing. It simplifies the process of filling, editing, and removing elements within images, making it an indispensable asset for designers, photographers, and creatives alike. Powered by machine learning AI, this feature analyzes every pixel of an image, ensuring a seamless integration of new elements by matching lighting, perspective, coloring, and shadows. What sets it apart is its non-destructive nature, organizing each generated element into its own layer with a layer mask, allowing for easy reversions and further modifications using other Photoshop tools.
Embracing Photoshop’s Generative Fill
Time is of the essence in the creative realm, and Photoshop's Generative Fill proves to be a time-saving marvel. In the past, tasks such as adding or removing elements in images required meticulous manual editing, involving steps like using the clone tool and adjusting lighting and shadows. Generative Fill streamlines this process, automating the addition or removal of elements with impeccable precision. Additionally, it serves as a cost-effective alternative to expensive stock photography subscriptions, generating images that rival professionally curated stock photos. Below I've included a tutorial for my most common uses of Photoshop's Generative AI.
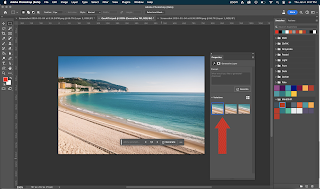
Navigating the Photoshop AI Generative Fill Taskbar
Once you import an image or create a new document, the Photoshop AI Generative Fill taskbar appears beneath the image area, providing a user-friendly interface for unleashing the power of this transformative feature.
How to Use Photoshop AI Generative Fill: A Step-by-Step Guide
Unlocking the full potential of Photoshop AI Generative Fill is a breeze with these simple steps:
Extend Images With Photoshop AI:
- Open the image.
- Adjust the image to the correct width.
- Use the Quick Selection Tool to draw a rectangle around the area you want to fill.
- Click Generative Fill and then Generate.


Remove Unwanted Elements With Photoshop AI:
- Create a selection around the unwanted element using the Quick Selection Tool.

- Click Generative Fill and then Generate.
- Choose the optimal option from the three provided.


Embrace the Future of Image Editing with Photoshop AI Generative Fill! Photoshop AI Generative Fill is a game-changing feature that empowers creatives to elevate their designs with unparalleled efficiency. Whether you're a seasoned designer or a newcomer to the world of Photoshop, harnessing the capabilities of AI-driven image editing is sure to enhance your creative endeavors. Embrace the future of design with Photoshop's Generative Fill and unlock a world of possibilities at your fingertips.
 Reviewed by Maggie
on
January 04, 2024
Rating:
Reviewed by Maggie
on
January 04, 2024
Rating:


